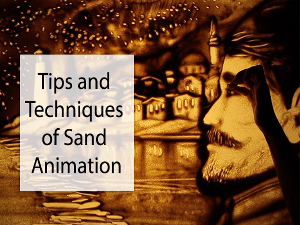
Tips and Techniques of Sand Animation
Sand animation is a great way to bring drawings to life. It can be used in many different contexts, such as advertising, education, and entertainment.
Making a good sand picture requires preparation and practice.
The following are some tips on how to make your sand animation:
Tips and Techniques of Sand Animation
Start with small
If you are planning to create a large picture, break it down into small parts and work on each part one by one.
When you have finished all the parts put them together to make the final picture.
this will help you get the right proportions and keep your viewer's attention from wandering from one part of the story to another.
Make a thin layer of sand
The second step in sand animation is to make a thin layer of sand.
A small amount of sand is required for this process and it should be spread in a thin layer on the board.
The thinner the layer, the easier it will be for you to draw on your animation frame by frame.
Make sure that there are no small pieces that might get in your way while drawing or move out from under you when you are drawing with them.
Know the forms you want to draw
Before you start drawing, it's important to know what you want to draw.
The process of drawing a sand animation can be very spontaneous and freeform, but if you want something more structured or planned out then that's possible as well.
It all depends on the type of animation you are making and what kind of message or story you want it to tell.
If your goal is for an organic, fluid piece where the forms move freely around each other and interact with each other on their terms, then having no plan might help achieve that effect.
However, if your goal is for an animated story with characters that follow certain rules within their world (like Disney), then having some sort of guide will help give everything structure throughout its creation process
Use bright light
You can use a light box to make a projector, or you can just use a lamp and place it behind your sand animation.
If you do this, try using natural light as opposed to flash photography—the colors will be more vibrant and accurate than if you were to use a flash.
Fast movements are not the key
When you're making a sand animation, fast movements are not the key.
You might think that the faster you move, the better your animation will be, but that's not true.
It is important to move slowly to create a smooth and even surface for your character.
The most important thing is using your hands, arms, and fingers to move sand from one place to another. Don't forget this!
Use your fingers, hands, and arms
- Use your hands, arms, and fingers to move the sand.
- Your hands can be used to shape large shapes in the sand while your arms and fingers can be used to make small details in the sand.
- To create an animated effect with your characters or objects, they must move from one position on the ground to another position on the ground over time (i.e., over some time).
- The closer you place these two positions together, the faster they will appear to move when viewed as if a camera were passing by them at a constant speed; therefore slow down the motion by making sure there are no gaps between different stages of movement for each object or character that you want animate with this technique!
Choose your music carefully
You can use music to enhance the video and make it more interesting.
Music also helps to distract viewers as they watch your animation, which allows you to work on other parts of the sand animation without distraction.
If you have chosen a song that has words, do not use it for your sand animation because people will be listening to the words instead of watching what is happening in your animation.
Just like with any project, choosing music is important and needs careful consideration when planning out your game's soundtrack. Y
ou will want something calming and soothing so that players won't get frustrated by difficult controls or frustrating puzzles. Choose songs that are similar to those already used in-game (if applicable), otherwise select something new but still familiar enough so that people recognize it from another area within the gameplay itself!
Avoid moving your hand too much at the beginning
When you're using sand, it's important to keep your hand steady.
The key is to be patient and not move your hand too much at first.
It will take practice to get this right, but don't worry about making mistakes at first.
If something isn't working out, just leave the sand where it is and try again later on when you've gotten more familiar with how the sand works with your style of drawing.
Getting frustrated won't help you learn how to draw better—so just relax!
Sand animation can be a lot of fun if done right, but there are some common mistakes people make that make their animations look bad or unprofessional.
For example: do not draw anything in one go; instead, start by drawing simple lines and shapes before adding detail later on when you've got more experience under your belt (this will make sense once we talk about how animators use reference images).
Also, avoid being afraid of making mistakes because they often lead us into new territory where our creativity flourishes (and sometimes even looks good!).
When drawing images, try to use only one color of sand
When you're drawing an image, it's important to use a single color of sand. This not only makes the process easier but also helps you to focus on the shape of your drawings.
If you want to add more than one color to your drawing, do so at different layers.
For example, if I were going to draw a volcano:
- First layer: I would start with black sand (or whatever dark color I was using) and make the base shape of my volcano. Then I'd fill in any holes or gaps with white granules until my whole base was covered in black granules.
- Second layer: In this step, I would add more detail using light brown granules; this will give depth and make things seem more realistic than just having solid black everywhere!
- You could also use other colors like green or red if those fit better for what you're trying to achieve!
- It all depends on how much time/effort/money (depending on what materials cost) that person wants to be put towards their project."
Making a good sand picture requires preparation and practice.
Making a good sand picture requires preparation and practice. You should know the forms you want to draw before beginning your project.
Use your fingers, hands, and arms to make the images instead of moving your whole body as much as possible to preserve the movement of the sand.
Try not to move your hand too much at first; this will keep the sand from being thrown out of place or into other people's work areas!
When drawing images with multiple colors of sand, try using only one color at a time so that no one else has trouble seeing what they're doing with their project.
Conclusion
Sand art is a unique medium of visual expression, and it can be very rewarding to experiment with different ways of creating images with sand. Just remember that it takes time and practice before you start to see results.


