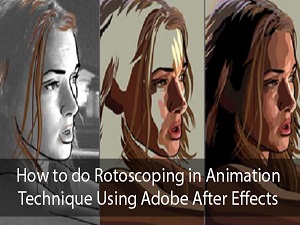
How to do Rotoscoping in Animation Technique Using Adobe After Effects
How to do Rotoscoping in Animation
Rotoscoping is an animation technique that animators apply to trace motion picture footage, frame by frame, to produce realistic action.
Originally, animators projected photographed live-action movie images onto a glass panel and located them over the image.
A step of how to do Rotoscoping in animation techniques using after effects are given below:
How to do Rotoscoping in Animation Technique in After Effects
1. Open the Project File
Click Save to Creative Cloud to copy the assets to your account. Open the rotoscoping.aep project file in After Effects.
Double-click on the shark.mp4 layer in the Timeline to open it in its Layer window.
2. Use the Roto Brush Tool
To separate the shark from the background, you need to define the edges of the shark in the first frame of the footage. Click on the Roto Brush tool.
With the Roto brush tool selected, define the portion of the footage that you want to keep.
Change the view level to fit the complete shark body in the frame. Use the brush to paint along the inside of the shark’s body.
A magenta segmentation boundary appears around the shark, indicating the foreground object to be separated from the background.
After defining the shark body uses the rot brush tool to refine any edge that is not perfect. Press the ALT/option key and notice that the brush tool changes from a green circle to a red.
Hold the Alt/Option while painting to define areas of the background that you want to be removed. Pay attention to areas around the shark fin where the initial selection is not perfect. It is important to spend as much time as needed to make the first selection as precise as possible.
3. Filter the Roto Brush Matte
Once you have defined your first selection, use the effect controls panel to improve the edge.
First, click the Toggle Alpha Boundary icon under the footage to preview the shark toward a black background. Now open the Effect Controls panel and explore the options listed below Roto Brush Matte.
You can get excellent results by increasing the Feather value, reducing Shift Edge to a negative amount, and fixing the Reduce Chatter percentage to help smooth the edges.
4. Refine the Matte for all Frames
Now that you have defined the mask for the first frame, you need to step through the rest of the frames in sequence to make sure the mask is accurate.
After Effects uses a combination of techniques to automatically calculate the edges of the object that is defined in the first frame and utilizes it in the following frames.
For best results, step through the frames and make manual corrections when necessary. First, click and drag the Roto Brush span to increase its length, so it takes up the full length of the footage.
Next, open the Preview panel and click the next frame to develop the footage by individual frame. If you notice any spaces where the edge of the mask needs to be filtered, use the Roto Brush tool to make the improvements, adding foreground background as required.
Follow the same step for every frame in your footage. When you are satisfied with the variety of edges throughout the entire footage, click Freeze at the lower-right angle of the Layer window to save the boundary data. After that method is finished, switch back to the Configuration window.
5. Add a Background Image
To create the composite footage, you will need to add an image to the shark footage.
Move background.jpg from the Project panel to the Timeline, just below the shark.mp4 layer.
Select the shark.mp4 layer and use the bounding box handles to resize and rotate the shark, so it fits the scene to your liking.
6. Color-Correct the Footage
To make a convincing composite, the shark will need some color correction to help match the background. Select the shark.mp4 layer in the Timeline and choose Effect > Color Correction. For this footage, some other effect layers are needed to correct the footage.
Add a curves layer a Hue/Saturation layer a photo filter, and a brightness and contrast affect layer. Experiments using values help remove some of the blues and greens from the shark. Removing some saturation and adding some tones will help it match the color and lighting of the background landscapes.
When you are satisfied with how things look, click the Play button in the Preview panel to play your finished composition.
KSHITIJ VIVAN Ahmadabad Satellite Road encourages students to make creative Animation. Students from different parts of the cities such as Kota, Bikaner, Join KSHITIJ VIVAN Animation Courses in Ahmedabad to learn various Animation Courses.


